
Approved: Fortect
Last week, some of our readers told us they stumbled upon a Vista bootable recovery disc. Swipe in from the right edge of the screen, and then tap Search. (If you are using a mouse, move the pointer over the lower-right corner of the screen, move the pointer up and watch the search.) Enter the recovery drive in the Start Search box, then select Create Drive Data. Relief”.
This page provides information on how to create a bootable USB rescue suit that includes either step-by-step instructions for installing Windows Vista / 7/8 or a recovery environment.
These instructions do not work on Windows XP!
EasyBCD cannot create a bootable USB drive on startup in Windows. You will be xp! You have to get throughand these courses are on Windows Vista or later for the following to work.
Of all NeoSmart Technologies’ products, the most popular are EasyBCD and EasyRE (our Windows recovery CDs).
This step-by-step guide shows you how to use EasyBCD to create a true bootable Windows recovery drive that can be used in place of a bootable CD or DVD.
You can even use these instructions to create a Universal USB Drive for the Swiss Army on your PC!
Requirements
Before starting this tutorial, there are a few things to remember:
- USB stick and USB stick with at least 300 million free space.
- Copy of EasyBCD
- Windows XP / Vista / 7 Services CD ISO Image
Get EasyBCD
EasyBCD can be downloaded or purchased from our website http://neosmart.net/EasyBCD/. If you use it at work or for intensive purposes, you should buy an EasyBCD license.
Obtaining an ISO image from a Windows XP / Vista / 7 recovery CD
To download graphics from http://systemdiscs.com/ you will need a purchase The ISO image you have chosen. Once you’ve downloaded the disc, you need to go to your order page (check your company email!) / When asked!
First Steps
Hit someone: plug in your USB drive
Before installing, please make sure you can connect your USB stick to your computer and get EasyBCD in the next steps!
Step 2. Install EasyBCD
Assuming you haven’t created EasyBCD yet, you will need to run the installation archive you downloaded earlier. Just click Next on all the prompts and you’re done.
Step 3. Launch EasyBCD
Open the Start menu, go to the program menu, expand the NeoSmart Technologies folder, expand the current EasyBCD folder and click EasyBCD to connect. Or just search.
on the start menu easybcd
Copy ISO To USB
Step 1. If necessary, copy the ISO image to a USB stick
You will need it at this point so that you can copy the ISO image you created or even downloaded from SystemDiscs.com to your USB stick. Find the file in “My Computer”, “My Documents”, copy and paste it to a USB stick (do not use it in a paspc on a USB stick!):
Step 2. Rename this ISO image
You are almost ready to add a new EasyBCD entry. EasyBCD cannot group the ISO image with spaces in the name, so you need to rename it from (for example) “EasyRE for Windows 7”, “EasyRE or for Windows 7.iso” if you need “Windows_7_Recovery_Disc” or “Windows_7_Recovery_Disc.iso”
If you see the Exclusive extension, do not change it. For example, if everything is written “EasyRE for 7 windows.iso”, do not forget to leave “the.iso” as usual after renaming!
Use EasyBCD To Create A Bootable USB Drive
At least one step: Moving from BCD to Deployment
After EasyBCD is announced, click the big button on the sidebar of EasyBCD that says “BCD Deployment”. You will be taken to the next page:
EasyBCD BCD Custom Screen
Step 2. Select a section from the drop-down menu
Click the dropdown at the top half of the screen (where it says “Section:”) and select the entry that unfortunately matches your USB drive:

EasyBCD BCD Deployment Screen Option 3: Section
Approved: Fortect
Fortect is the world's most popular and effective PC repair tool. It is trusted by millions of people to keep their systems running fast, smooth, and error-free. With its simple user interface and powerful scanning engine, Fortect quickly finds and fixes a broad range of Windows problems - from system instability and security issues to memory management and performance bottlenecks.

Step of installing BCD to USB device
Now you need to share the bootloader with EasyBCD in order to install the bootloader on this USB stick so you can boot from it. Just click Install BCD to start and wait for the BCD installation to complete:
BCD screen installed by EasyBCD
Step 4. Allow easybcd to populate the USB bootloader.
EasyBCD asks you (nicely enough) about the current event for which you want to load the newly created BCD from a USB stick. Make sure customers click Yes when they see this dialog:

Speed up your computer's performance now with this simple download.
In the search box next to the Start button, find and select Create Recovery Drive.When the tool type opens, make sure it completes backing up the system files to the recovery drive and then click Next.Connect your USB hard drive to your computer, select it and click Next.Select “Create”.
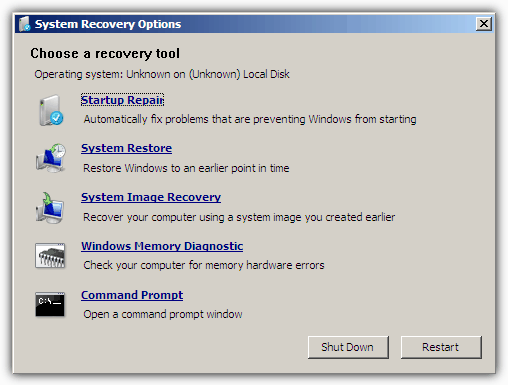
Turn on or restart your computer and move “F8” to the start screen before the Windows Vista logo appears.Temporarily use the arrow to select Repair your computer from the menu.
Download USB Creator 2.0.Install Easy USB Creator 2.0.Browse the Windows Vista ISO to downloadin the ISO file field.Select the destination for your final USB drive in the Destination Drive field.Begin.